How to Calculate Tile for a Room
Calculating tile for a room comes down to three numbers — the floor area, the size of one tile, and a waste factor for cuts and breakage. This guide walks through each step, works a full example end to end, and flags the mistakes that leave you one box short on installation day.
Working out how to calculate tile for a room is mostly arithmetic — area divided by tile size, plus a cushion for waste. The trouble is that every step has a small trap: the grout lines that quietly change a tile's footprint, the L-shaped corner that breaks the simple length-times-width formula, the box that turns out to cover fewer square feet than you assumed. Get any one of them wrong and you either over-buy by a few hundred dollars or, worse, run out mid-job and discover the next batch is a slightly different shade.
This guide goes through it in four steps — measure the area, find the tile's area, add a waste factor, convert to boxes — then covers grout and trim, runs a full worked example, and lists the mistakes that trip up first-time tilers. Once the logic is clear, you can let the SudoTool tile calculator do the multiplication and rounding for you.
The Basic Formula to Calculate Tile for a Room
The core formula is short:
Tiles needed = (floor area ÷ area of one tile) × (1 + waste factor)
As long as the two areas are in the same units, it works for any room and any tile size. The first half — area divided by tile area — gives the bare theoretical count. The second half — the waste multiplier — turns that into a number you can actually order against. Both halves have a wrinkle worth knowing before you trust the result.
The wrinkle in the first half is grout. The space between tiles means each tile's effective footprint is slightly larger than the tile itself. A 12-inch by 12-inch tile set with a 1/8-inch grout line covers a touch more than one square foot, so a room actually needs marginally fewer tiles than the raw division suggests. With narrow joints the difference is tiny and safe to ignore; with small mosaic tiles or wide joints it adds up. This is one of the reasons hand calculations drift from reality — and a good reason to check the result against a calculator that accounts for the joint.
Step 1 — Measure the Room's Square Footage
Run a tape measure along the length and the width of the floor and multiply the two. A room that is 12 feet long and 10 feet wide is 120 square feet. That is the whole of Step 1 for a simple rectangle.
Two habits keep this step honest. First, measure twice — the single most common source of an ordering error is a mismeasured wall, and tape is cheaper than a return trip. Second, subtract anything you are not tiling: a built-in vanity, a tub footprint, a shower base, kitchen cabinetry that sits on the subfloor. For a wall-tile project the same logic applies in reverse — find the wall area, then subtract the doors and windows you will not be tiling over.
Handling L-Shaped and Irregular Rooms
When the floor is not a clean rectangle, divide and conquer. Break the space into separate rectangles, calculate the area of each one, and add them together. An L-shaped room is just two rectangles; a bump-out for a closet is a third. If a wall runs at an angle and leaves a triangle, the area of that triangle is base × height ÷ 2. Sketch the room on paper, label each piece, and sum them — it is far more reliable than trying to eyeball an odd shape as a single number. The retailer how-to guides from The Home Depot and Lowe's both walk through this same split-into-rectangles method.
Step 2 — Find the Area of One Tile
Convert your tile's dimensions to the same unit as the room. For tiles measured in inches, multiply length by width and divide by 144 to get square feet. A few common sizes:
| Tile size | Area of one tile |
|---|---|
| 12″ × 12″ | 1.00 sq ft |
| 6″ × 6″ | 0.25 sq ft |
| 12″ × 24″ | 2.00 sq ft |
| 3″ × 6″ (subway) | 0.125 sq ft |
| 24″ × 24″ | 4.00 sq ft |
Two tile types break the simple length-times-width rule. Hexagonal tiles are measured by side length and have their own geometry, so the per-tile area is smaller than the bounding box implies. Mosaic tiles usually come pre-mounted on sheets — you do not count individual chips; you work in sheet coverage instead, which the product label states (most 12-inch square sheets cover roughly 1.0 to 1.15 square feet). For those, divide the floor area by the sheet coverage rather than a single tile's area.
Step 3 — Add a Waste Factor
The number you get from dividing area by tile area is a best case that assumes every tile lands whole and unbroken. Real installations never do. You cut tiles to fit the edges and around obstacles, a few crack during handling or scoring, and you will want a handful left over for the inevitable future repair. The waste factor covers all three. The rougher the layout, the more you cut, and the higher the percentage:
| Pattern | Waste factor | Why |
|---|---|---|
| Straight grid | 10% | Perpendicular cuts at the room edges only |
| Brick / staggered | 12% | Slight stagger adds offcuts at row ends |
| Diagonal | 15% | Angled cuts at every wall |
| Herringbone | 18% | Angled offcuts rarely fit another spot |
| Mosaic / complex | 20% | Highest cut frequency, many small pieces |
These five percentages match the pattern options in the tile calculator. They are widely used as the working standard across the tile trade, and are commonly attributed to installation guidance from the Tile Council of North America (TCNA) and the National Tile Contractors Association (NTCA) — though both associations publish their detailed numbers in paid reference manuals, so treat these as well-established rules of thumb rather than figures you can verify against a free official source. Where sources disagree, they lean higher, not lower: many installers order 20% for herringbone, and 25% for a tricky room or a first attempt, because every perimeter piece in a herringbone gets an angled cut that usually cannot be reused. When in doubt, round the percentage up.
Large-format tile is a special case. Tiles with one side of 15 inches or more behave differently from the pattern table. They produce fewer cuts but punish each mistake harder — a cracked large tile or a miscut on an uneven floor wastes a lot of material at once. Guidance ranges widely: as little as 5–7% for a simple straight layout in a square room, up to 30% for big, breakage-prone porcelain. Lean generous if your subfloor is not perfectly flat.
The waste cushion is not money thrown away. The real goal is buying enough in a single order from the same production run, because tile is made in batches — the next section explains why that matters and how to turn your tile count into boxes.
Step 4 — Convert Tiles to Boxes
Here is the detail that catches people at the register: tile is not sold by the individual piece. It is sold by the box, with each box's coverage printed in square feet — a label might read "covers 15.6 sq ft." How many physical tiles that represents depends entirely on size. Large 12×24 or 24×24 tiles come just a few to a box; standard 12×12 floor tiles run roughly 10 to 15; small subway and mosaic tiles come many more. According to retailer guidance compiled by Bob Vila, the practical move is to work in coverage, not piece count.
So the real ordering sequence is: take your floor area, add the waste factor, divide by the square footage one box covers, and round up to the next whole box. Never round down. Coming up half a box short during installation is exactly how you end up reordering — and a reorder weeks later often arrives from a different dye lot.
That phrase, dye lot, is the reason the whole "buy extra in one order" rule exists. Tile is fired in batches, and color and shading vary subtly from one batch to the next. Two boxes of the "same" tile bought a month apart can read as visibly different on the floor, especially under raking light. Buy everything at once, confirm the boxes share a lot number where it is printed, and stash two or three leftover tiles for repairs years down the line — replacing a cracked tile in 2030 from your own spare beats hunting for a discontinued color.
Don't Forget Grout and Trim
It is easy to budget the tile and forget everything that goes around it. Grout is the big one. How much you need depends on four things — tile size, joint width, tile thickness, and total area. Smaller tiles and wider joints mean more linear feet of grout line per square foot of floor, so they consume more. One counterintuitive detail: widening the joint from 1/8 inch to 1/4 inch does not double the grout, it nearly triples it, because the joint grows in both width and depth at once.
Joint width also decides which grout to buy. The US tile-industry standard — consistent across the TCNA, Custom Building Products, and Daltile — is sanded grout for joints 1/8 inch and wider, and unsanded grout for anything narrower. The sand gives wider joints the structure they need to resist shrinkage cracking; in a narrow joint the sand simply will not fit, and it can scratch a polished tile face. If your design has exposed tile edges that need a finished look, count the linear footage of those edges separately and add bullnose or trim pieces to the order.
A Worked Example
Put it together on a real room. Say you are tiling a 12 ft × 10 ft floor with standard 12″ × 12″ tiles in a brick/staggered layout:
- Floor area: 12 × 10 = 120 sq ft
- Area of one tile: 12″ × 12″ = 1 sq ft
- Bare tile count: 120 ÷ 1 = 120 tiles
- With a 12% waste factor: 120 × 1.12 = 134.4, round up to 135 tiles
- In boxes of 10: 135 ÷ 10 = 13.5, round up to 14 boxes
- Rough tile cost at ~$2 a tile: 135 × $2 ≈ $270 (grout, adhesive, and trim are extra)
Switch that same room to a diagonal layout and the waste factor climbs to 15%: 120 × 1.15 = 138 tiles. One design decision just added three tiles. Push it to herringbone at 18–20% and you are at 142–144 tiles for the identical floor. The room never changed — only the pattern did — which is exactly why the waste factor belongs in the formula and not as an afterthought.
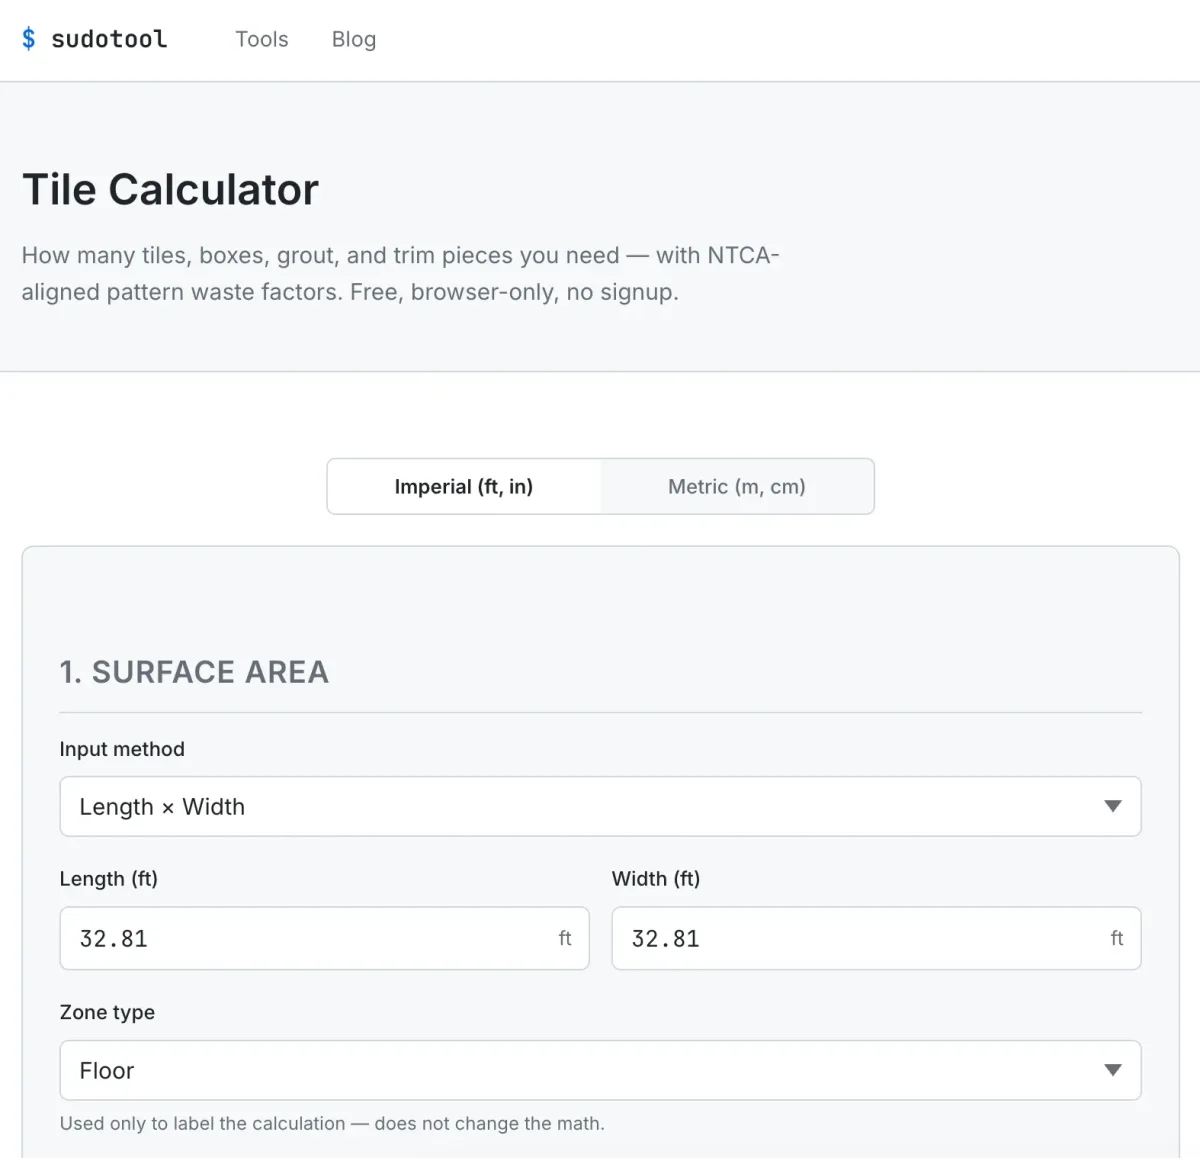
Enter the room size, tile size, and installation pattern — the calculator applies the right waste factor and rounds up to whole tiles and boxes, then adds optional grout and trim.
Common Tile Calculation Mistakes
Most ordering errors come from the same short list:
- Skipping the waste factor entirely. Ordering the bare theoretical count almost always leaves you short once cutting starts.
- Ignoring the dye lot. Reordering later brings a batch that may not match. Buy it all at once, from one lot.
- Not splitting irregular rooms. Eyeballing an L-shaped floor as one rectangle throws the area off. Break it into pieces and add them up.
- Keeping no spares. Set aside a few tiles for future repairs before the leftovers get returned or tossed.
- Rounding boxes down. Always round up to the next whole box — a fractional box does not exist at the store.
- Forgetting pattern repeats. Directional or patterned tiles waste more, because matching the pattern forces extra cuts.
Frequently Asked Questions
How much extra tile should I buy?
About 10% for a simple straight layout, 15% for diagonal, and 15–20% for herringbone or other complex patterns — many installers go to 20% or even 25% on herringbone and tricky rooms. It is far cheaper to have a little extra than to reorder a mismatched batch.
How do I calculate tile for an L-shaped room?
Split the floor into rectangles, find the area of each, add them together, then apply the waste factor to the combined total. Triangular leftovers are base × height ÷ 2.
Is tile sold by the box or by the square foot?
By the box, but the coverage is listed in square feet on the label. Divide your area-plus-waste figure by the box's coverage and round up to whole boxes.
Do bigger tiles need more or less waste?
Large-format tiles involve fewer cuts but costlier mistakes when one cracks or is miscut. A simple straight layout can need as little as 5–7%, while breakage-prone large porcelain is sometimes ordered with up to 30% overage.
How much grout do I need?
It depends on tile size, joint width, tile thickness, and area — smaller tiles and wider joints use more. A grout calculator handles the formula; just remember that widening the joint increases grout faster than you would expect.
The Bottom Line
Calculating tile for a room is three ideas stacked together: measure the area accurately, divide by the area of one tile, and add a waste factor that matches your pattern — then round up to whole boxes and buy it all in one batch. The arithmetic is simple; the discipline is in not skipping the waste cushion, not rounding down, and not ignoring the dye lot. The same logic carries over to other materials, too — our guide on paint coverage per gallon applies the identical "area ÷ coverage, then add a buffer" thinking to paint. When the numbers start to blur, run the room through the tile calculator and let it handle the rounding.
This is a general home-improvement guide based on retailer and manufacturer guidance plus widely used trade rules of thumb. Waste-factor percentages are working estimates, not guarantees — actual waste varies with room shape, tile size, installer skill, and pattern. Grout coverage and sanded/unsanded thresholds follow manufacturer documentation (TCNA, Custom Building Products, Daltile) but specific products vary; always check the product label and box coverage before ordering. For structural concerns, uneven subfloors, or large-format installations over 15 inches, consult a professional tile installer.
- Calculator.net — Tile Calculator. Reference for the core formula (area ÷ tile area), how grout gaps reduce tile count, and rounding up to whole units.
- Bob Vila — How Much Tile Do I Need for a Floor or Wall? Homeowner reference for working in box coverage, rounding up, and the 10–15% waste cushion.
- The Home Depot — How to Calculate Square Footage. Reference for measuring area and splitting irregular rooms into rectangles.
- Lowe's — Tile Flooring Calculator. Reference for the measure-and-divide method and box conversion.
- Tile Council of North America (TCNA) — Grout FAQ. Industry reference for the sanded (1/8″ and wider) vs unsanded (narrower) grout threshold.
- Custom Building Products — TB85: Grout Joint Width. Manufacturer technical bulletin on grout joint width standards and grout-type selection.
- Daltile — Which Grout Is Best for My Tile? Manufacturer reference confirming the sanded/unsanded joint-width rule.
- SudoTool — Paint Coverage per Gallon: The Real Number. Sister guide applying the same area-÷-coverage-plus-buffer method to paint.