Expansion Gap for Laminate Flooring: How Big and Why
The most expensive laminate mistake usually isn't a badly cut plank — it's the strip of empty space around the edges that nobody can see. Skip it, and a few weeks later the floor peaks in the middle or lifts off the wall. The cause is almost always a missing expansion gap.
The expansion gap for laminate flooring is the deliberate empty space left between the planks and every wall or fixed object so the floor can grow and shrink without anything getting in its way. It is invisible once the baseboards go back on, which is exactly why it gets skipped — and skipping it is one of the most common reasons a laminate floor fails. According to installer training materials from CFI and the National Wood Flooring Association (NWFA), improper expansion gap together with improper end-joint stagger accounts for roughly half of all laminate installation claims.
This guide covers (1) the gap size, with the real specs from four manufacturers, (2) why the HDF core moves in the first place, (3) exactly what goes wrong without a gap, (4) where to leave the gap and how to hide it, (5) when a large room needs an intermediate expansion joint, and (6) whether rigid-core vinyl plank needs a gap too.
How Big Should a Laminate Expansion Gap Be?
The short version is a range — about 1/4 inch to 3/8 inch (6–10 mm) around the perimeter — but the binding answer is whatever your manufacturer prints, because the gap is usually a condition of the warranty. The variation isn't carelessness: thicker planks, larger floors, and bigger swings in humidity all argue for a slightly larger gap. Four widely used brands land like this:
| Manufacturer | Perimeter gap | in / mm | Large-room joint threshold |
|---|---|---|---|
| Pergo | All walls, pipes, thresholds, fixed objects | 3/8" (~9.5 mm) | T-molding once a run exceeds 40 ft in length or width |
| Quick-Step (Uniclic) | All sides, pipes, thresholds, fixed objects | 3/8" (9.52 mm) | About 40 ft (~12 m) — its own documents vary; defer to the product guide |
| Mohawk RevWood | All sides, pipes, thresholds, fixed objects | 3/8" | Check your specific product line |
| Shaw (glueless laminate) | Whole perimeter, cabinets, pipes, columns | 1/4" | T-molding for rooms over 26 × 40 ft (1,040 sq ft) |
| General safe value | — | 1/4"–3/8" (6–10 mm) | Roughly a 30–40 ft plane |
A couple of notes on that table. Mohawk's official RevWood installation instructions call for 3/8 inch, even though some retailer summaries list 1/4 inch for certain lines — another reason to check your specific product line rather than a third-party page. And the gap is more forgiving on the generous side than the tight side: leaving slightly too much space costs nothing visually, because the baseboard hides it either way, whereas leaving too little is what causes failures. The practical rule of thumb: if you are unsure, set the gap at 3/8 inch (about 10 mm). That satisfies three of the four brands above and is safe in nearly every situation.
Why Laminate Needs an Expansion Gap at All
To see why the gap matters, it helps to know what a laminate plank actually is. The photographic top layer and clear wear coat get the attention, but the body of the plank — the core — is high-density fiberboard (HDF), which is wood fiber compressed under heat and pressure. It is still wood, and wood is hygroscopic: it absorbs and releases moisture from the surrounding air, swelling a little when the air is humid and shrinking when it is dry. Indoor humidity rises in a muggy summer and falls under winter heating, and the plank quietly changes size with it. Manufacturer installation guides all make the same point — because indoor humidity varies with the season, the floor has to be able to expand and contract.
The reason that movement needs somewhere to go is the second half of the story: laminate is a floating floor. The planks click into one another and rest on top of the subfloor without nails, staples, or glue, held together only by their locking edges rather than fastened to the structure. So the entire field of flooring behaves like one large, loosely placed sheet that expands and contracts as a unit. A nailed-down board is pinned in place and can fight movement plank by plank; a floating floor cannot, which is precisely why it has to have room to move at every edge.
A useful way to picture it: a floating laminate floor should sit in a room the way a canvas sits loosely inside a picture frame, not the way a tile is cemented into place. Give it a millimeter of slack at the edges and it shifts harmlessly as the seasons change. Butt it tight against the walls and, when it expands, the only direction left to move is up.
What Happens Without an Expansion Gap
When there is no gap, or not enough of one, the expanding floor presses outward against the walls and fixed objects, runs out of room, and the pressure has to escape somewhere. It shows up as one of a handful of recognizable failures:
| Symptom | What it looks like | Cause |
|---|---|---|
| Peaking | Two planks push up at a seam into a ridge, like the peak of a roof | Expanding planks press into each other; the most common symptom, and it can take weeks to months to settle |
| Buckling | A section of floor lifts off the subfloor entirely | A more severe stage, when compression exceeds what the seams can hold |
| Lifting / warping | Edges rise or planks distort | Planks pressing continuously against walls or fixed objects |
| Joint separation | Visible gaps open between planks | Excess contraction, or stress rebounding after compression |
| Creaking | Repeated noise underfoot | Stressed seams and transition points |
Peaking is by far the most common, and it is stubborn: once a seam has lifted it can take weeks or months to relax, and it often will not lie flat again on its own. The reason these failures are costly is that there is rarely a tidy spot repair. Fixing peaking or buckling usually means pulling the floor back up, trimming the planks along the perimeter to create the gap that should have been there, and relaying — which is most of the original job over again. There is a warranty dimension, too: an installation that ignores the manufacturer's gap requirement can void the warranty, so the missing 3/8 inch can cost you the coverage as well as the floor.
Where to Leave the Gap (and How to Hide It)
The gap has to go everywhere the floor meets something solid and vertical. In practice that means every wall, every pipe and radiator, thresholds and the space under doors, built-in cabinets and kitchen islands, columns, floor vents, and any other fixed object. Manufacturer instructions are consistent on this: leave the gap on all sides of the floor, around pipes, under doors, and around anything fixed in place.
Leaving it is mostly a matter of discipline at the edges. Most installation kits include spacers — commonly 1/4 inch or 3/8 inch — that you wedge between the planks and every wall as you go, then remove at the end. A few specifics are worth getting right:
- Walls. Start the first row with spacers against the wall and keep them in along every perimeter wall until the floor is down. Keep the final row at least 2 inches wide; a sliver-thin last plank is fragile and hard to seat.
- Pipes. Drill the hole the diameter of the pipe plus about 3/4 inch, so there is expansion room all the way around it.
- Doorways. Undercut the door casing and jamb so the planks float underneath while still keeping the gap, and check that the door still opens and closes — leave at least 3/8 inch of clearance.
Because the gap can't be left on display, you cover it. Baseboard, quarter-round, or shoe molding all do the job, and the one rule that matters more than any other is this: fasten the molding to the wall, not to the floor. Nail trim down into the planks and you pin the floating floor in place, which defeats the entire purpose of the gap. As Pergo's installation guide puts it bluntly, "Never attach the molding to the floor." In wet areas like bathrooms and kitchens, the gap around tubs, showers, sinks, and toilets is filled with 100 percent silicone sealant instead — flexible enough to absorb movement while sealing out water.
Large Rooms: When You Need an Intermediate Expansion Joint
For a very long or very wide run, the perimeter gap alone isn't enough. Past a certain span the cumulative movement across the floor is too much to absorb at the edges, so the floor has to be broken in the middle with an intermediate expansion joint — in practice, a T-molding bridging the gap between two sections. The trigger point varies by manufacturer:
- Pergo: install a T-molding once a run exceeds 40 feet (about 12 m) in either length or width, and use one in any doorway narrower than 4 feet.
- Shaw: rooms larger than 26 by 40 feet — that is, 1,040 square feet — require a T-molding for expansion, and doorways narrower than 6 feet get one as well.
- Quick-Step: guidance points to roughly 40 feet (about 12–13 m) before a mid-floor joint is needed, but its own documents differ on the exact figure, so treat it as approximate and defer to your product guide.
The broad industry rule of thumb sits in the same range: a floating floor is generally treated as safe up to about a 30-to-40-foot plane, beyond which you add a break. Manufacturers also vary enough that no single number is universal — the conservative move on a borderline run is to add the joint rather than skip it. It is good practice to break the floor at the doorways between rooms regardless, which divides one large continuous expanse into smaller areas that can each move independently. (Choosing between a T-molding, a reducer, and other transition profiles is a separate topic; the point here is simply that a long run has to be broken somewhere.)
Does Rigid-Core Vinyl Plank (LVP/SPC) Need an Expansion Gap Too?
Yes — any floating floor needs an expansion gap, and rigid-core vinyl plank is no exception, though it usually needs a little less than laminate. One flooring guide that compares types side by side lists about 3/8 inch (10 mm) for laminate, 1/4 inch (6 mm) for SPC and rigid-core LVP, and 1/2 inch (12 mm) for floating engineered hardwood, on the principle that every floating floor — from SPC to engineered wood — expands and contracts with temperature and humidity.
The reason vinyl gets a smaller number is that an SPC (stone-polymer composite) core is more dimensionally stable than laminate's HDF — but "more stable" is not "inert." Rigid vinyl still reacts to temperature swings in particular, such as direct sun through a large window or heat from a radiant system, so the gap is not optional, just smaller; in wide rooms it too benefits from a larger allowance. The takeaway across materials is the same: whatever you are installing, the "perimeter gap plus a T-molding for large rooms" principle holds, and only the exact millimeters change from one product to the next. (Direction and underlayment for vinyl plank are their own subjects, covered in the related guides below.)
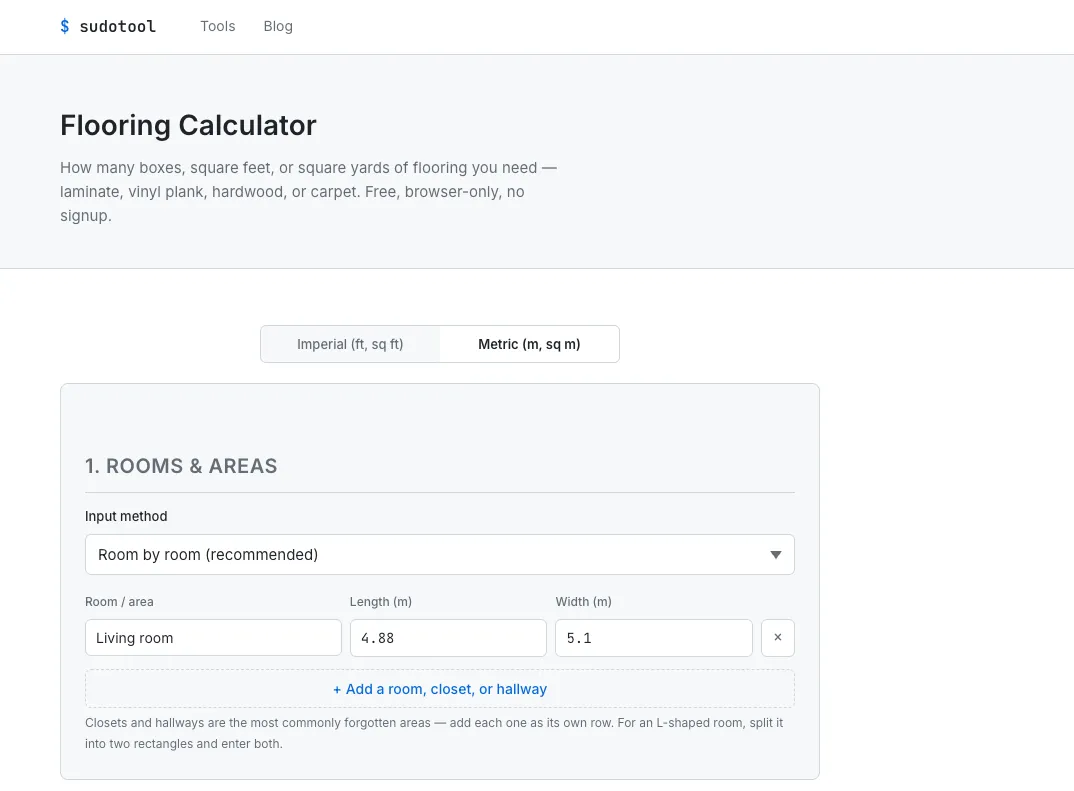
The gap itself costs nothing — but get the room measurements and the material order wrong and you are short planks on installation day. Enter your room and let the tool size the order, with the right waste factor already applied:
Plan the perimeter gap on site; size the material order in the calculator before you buy.
Frequently Asked Questions
How big should the expansion gap be for laminate flooring?
Most manufacturers call for a 1/4-inch to 3/8-inch (about 6 to 10 mm) gap around every wall and fixed object. Pergo, Quick-Step, and Mohawk RevWood specify 3/8 inch, while Shaw uses 1/4 inch. When in doubt, 3/8 inch is safe in almost every case. Always defer to your product's installation guide, since the figure is usually a warranty condition.
What happens if you don't leave an expansion gap for laminate flooring?
A floating laminate floor expands with humidity, and with nowhere to go the planks push against each other and the walls. That produces peaking, where seams lift into a ridge, plus buckling, lifting, warping, and joint separation. Peaking can take weeks or months to settle, and the usual fix is lifting the floor to trim the perimeter.
Why does laminate flooring need an expansion gap?
A laminate plank's core is high-density fiberboard — compressed wood fibers — which absorbs and releases moisture and so swells and shrinks slightly with indoor humidity and temperature. Because the floor floats, clicked together but not nailed or glued down, the whole field moves as one. Without space at the edges it has nowhere to expand but up.
How do you hide the expansion gap in laminate flooring?
Cover it with baseboard, quarter-round, or shoe molding. The key rule is to fasten the molding to the wall, never to the floor, because pinning the floor down defeats the floating movement the gap exists to allow. In bathrooms and kitchens, fill the gap with 100 percent silicone sealant instead of leaving it open.
Do large rooms need extra expansion joints for laminate?
Yes. A very long or wide run needs more than a perimeter gap. Pergo calls for a T-molding once a run passes about 40 feet (roughly 12 m) in length or width, and Shaw requires one for rooms larger than 26 by 40 feet, or 1,040 square feet. Thresholds vary by brand, so check your product guide. It is also good practice to break the floor at doorways between rooms.
Does rigid-core vinyl plank (LVP/SPC) need an expansion gap too?
Yes. Any floating floor needs a gap, though rigid-core vinyl usually needs slightly less than laminate. One industry guide lists about 3/8 inch for laminate, 1/4 inch for SPC/rigid LVP, and 1/2 inch for floating engineered hardwood. SPC is dimensionally stable but still reacts to temperature swings, so the gap is not optional — just smaller.
This is a general guide, not a substitute for your product's instructions. Always follow your product's printed installation instructions for the exact gap size and large-room joints, which may be a condition of the warranty.
- Pergo — Installation Essentials Guide (laminate). Specifies a 3/8-inch minimum expansion joint on all sides, around pipes, thresholds, under doors, and around fixed objects; a T-molding where a run exceeds 40 feet in length or width; pipe holes drilled to the pipe diameter plus 3/4 inch; and that molding is attached to the wall, never the floor.
- Mohawk — RevWood Installation Instructions. Manufacturer instructions calling for a 3/8-inch minimum expansion joint on all sides of the floor, around pipes, thresholds, under doors, and around any fixed objects such as floor vents and kitchen islands.
- Quick-Step — Maximum floor length without an expansion gap. Guidance that a floor can run roughly 13 m before a mid-floor joint is needed, with an 8–10 mm expansion gap at walls and doors that is covered by skirting or profiles.
- Shaw — Glueless Laminate Installation Instructions. Uses 1/4-inch spacers around the entire perimeter, cabinets, pipes, and columns; requires a T-molding for rooms larger than 26 by 40 feet (1,040 sq ft) and for doorways narrower than 6 feet; and keeps the last row at least 2 inches wide.
- CFI / NWFA — Hardwood, Laminate & LVP Installation Training. Installer training material stating that improper expansion gap and improper end-joint stagger account for about 50 percent of installation claims, and that the manufacturer-recommended gap belongs at walls, thresholds, pipes, and other fixed objects.
- BuildDirect — The Right Expansion Gaps for Every Flooring Type. Comparison listing about 3/8 inch (10 mm) for laminate, 1/4 inch (6 mm) for SPC/rigid LVP, and 1/2 inch (12 mm) for floating engineered hardwood, noting every floating floor expands and contracts with temperature and humidity.
- Floor Central — Laminate Floor Peaking, Cupping & Buckling. Reference for peaking as the most common symptom — planks pushing up at the seam — which can take weeks or months to settle, and for buckling as a more severe stage where the floor lifts off the subfloor.
- The Carpet Stop — Why Laminate Flooring Needs Expansion Gaps. Reference for why a floating floor — not nailed or glued — needs room to move, and how, without that margin, expanding planks have nowhere to go and lift.