Can You Put Vinyl Plank Over Tile?
Skipping the tear-out can save a weekend and a dumpster of dust — but only if your tile passes a short list of checks first. Get those wrong and the new floor telegraphs every grout line or won't let a door close.
Putting vinyl plank over tile is one of the most appealing shortcuts in a flooring project: no jackhammer, no hauling out broken ceramic, no skim of dust over the whole house. In most cases it works — but it is a conditional yes, not an automatic one. Whether you can go over your tile comes down to four things the tile has to be: bonded, flat, free of deep grout lines, and low enough that the extra height doesn't block a door or an appliance.
This guide covers (1) a checklist for deciding whether you can go over your tile at all, (2) the exact grout and flatness numbers manufacturers and installers use, (3) why floating click-lock is usually the right choice over tile, (4) the height problem at doors, transitions, and appliances, (5) how to prep the floor step by step, and (6) when the smart move is to remove the tile instead.
Vinyl Plank Over Tile: A Conditional Yes
Luxury vinyl plank earns its reputation as a "go over almost anything" floor because most of it installs as a floating floor — the planks click together and rest on top of the existing surface rather than being fastened down. Manufacturer guidelines commonly allow a floating vinyl plank floor over existing hard surfaces, including ceramic and porcelain tile, as long as that surface meets their flatness and bonding requirements. COREtec, for example, states that ceramic tile, resilient tile, and sheet vinyl "must be well-bonded to subfloor, in good condition, clean and level" before its planks go down.
That last part is the catch. The floor floats, but it still needs something stable and even to float on. A floating plank can't fix a tile that rocks, a grout valley deep enough to feel through your sock, or a doorway that no longer has room for a door. So the real question isn't "can vinyl plank go over tile" in the abstract — it's whether your tile clears the bar. The checklist below is how you find out.
Can You Go Over Your Tile? The Conditions Checklist
Run your floor through these six checks before you buy a single box. If every row lands in the left column, you are clear to go over the tile. Any row in the right column is a thing to fix — or a reason to pull the tile up instead.
| Check | Go ahead if… | Stop and fix first if… |
|---|---|---|
| Tile is bonded | No loose, cracked, or hollow-sounding tiles when you tap them | More than roughly 20% are loose or cracked — remove the tile |
| Surface is flat | Flat within about 3/16″ over 10 ft (≈ 1/8″ over 6 ft) | Dips or humps beyond that tolerance — level it first |
| Grout-line width | Grout joints up to 1/4″ wide | Wider than 1/4″ — fill flush with a cementitious patch |
| Grout-line depth | Shallow (under about 1/16″) — fine as-is for click-lock | Deeper than about 1/8″ — skim coat or self-level |
| Height clearance | Doors, dishwasher, and transitions still clear after a ~4–8 mm buildup | A door won't close or an appliance won't fit — undercut or remove tile |
| Moisture | Dry slab, or a moisture-barrier underlayment in place | Moisture is actively rising through the grout — don't trap it |
The two grout rows and the flatness row are where most over-tile jobs are won or lost, so they each get a closer look next. The bonding check is the simplest and the most important: walk the floor and tap every tile with a hard object or a rubber mallet. A solid tile gives a sharp, dense sound; a loose or de-bonded one rings hollow. Loose, cracked, or hollow-sounding tiles signal an adhesion failure, and an unstable tile underneath can cause the floating vinyl floor on top to fail. A handful of bad tiles can be chipped out and patched; a floor that is hollow in many places is telling you to start over.
The Grout-Line Problem (and the Exact Thresholds)
Deep grout lines are the single most common reason a vinyl-plank-over-tile job looks wrong. There are two ways they cause trouble. With thinner planks, the valleys can telegraph — you see and feel the grid of grout lines through the new floor. And with click-lock planks bridging a wide gap, the unsupported span can flex, which leads to clicking underfoot or joints that creep apart over time. The fix is to bring the grout flush with the tile so the plank rests on a continuous, even plane.
Width and depth are judged separately. On width, manufacturers give a hard number. COREtec's installation guidance says the product can be installed over ceramic or porcelain tile with up to a 1/4-inch-wide grout joint, and that if a joint is wider than that, a cementitious patching compound should be used to fill it flush with the tile surface. So 1/4 inch is a useful line to remember: at or under it, a click-lock floating floor generally spans the joint fine; wider than it, fill before you lay.
On depth, the guidance is less of a published spec and more of an installer rule of thumb. A general installer guideline runs in three tiers: grout that sits nearly flush with the tile, under roughly 1/16 inch, can usually be left alone for a click-lock floor; grout in the 1/16-to-1/8-inch range is handled with a thin skim coat of leveler or a thin underlayment laid over the tile; and grout deeper than about 1/8 inch is best dealt with by skim-coating or self-leveling the whole floor so nothing telegraphs. Treat those as practical thresholds many installers use rather than a manufacturer warranty number, which varies by brand and product.
You have two practical ways to deal with deep or wide grout. The first is to fill the joints themselves: trowel a cementitious patching or self-leveling compound into the lines and screed it flush with the tile. The second is to float over the whole surface — either skim-coat the entire floor with leveler or lay a thin underlayment (many include a built-in moisture barrier) so the plank never touches the grid. Deep, wide joints usually call for filling or a full skim coat; shallow ones can be covered by an underlayment alone. Whichever route you take, recheck flatness afterward with a long straightedge before the first plank goes down.
How Flat Does the Tile Need to Be?
Flatness is the requirement that actually decides whether a floating floor performs, and it has a number behind it. The widely cited manufacturer standard is flat to within about 3/16 inch over a 10-foot span; COREtec states its subfloor should be "dry and level to 3/16″ per 10 ft. radius," and its Pro guidance phrases the same tolerance as 3/16 inch in 10 feet or 1/8 inch in 6 feet. Check it by sliding a long straightedge or level across the floor in several directions and watching for gaps underneath.
Where the floor falls outside that tolerance, you level it: grind or sand down high spots, and fill low spots and any deep grout valleys with a cementitious self-leveling compound. Lippage — where one tile edge sits proud of its neighbor — counts here too, because a raised edge can bite up into a plank from below. The goal is a continuous plane within the manufacturer's flatness spec, not a cosmetically perfect surface; the planks forgive color and texture, but they do not forgive an uneven base.
Floating Click-Lock vs. Glue-Down Over Tile
Over tile, a floating click-lock floor is generally the better choice, and the reason comes down to adhesive. Glazed tile is designed to be hard and non-porous, which is exactly the surface glue struggles to grip — and the grid of grout lines gives a glue-down plank an uneven bed to bond to. A floating floor avoids the problem entirely: it simply rests on top of the tile, held together by its own locking edges rather than stuck to anything. Floating installs also let you walk on the floor right away, while a glue-down floor needs its adhesive to cure, often over a day or more, before normal use.
Glue-down vinyl has its place — large commercial spaces and very high-traffic areas sometimes favor a fully adhered floor — but for a typical home going over existing tile, floating click-lock is the default. One caution worth repeating: choosing a floating floor does not let you skip the bonding check. The tile underneath still has to be solid, because a floating plank can only be as stable as the surface it sits on.
The Height Problem: Doors, Transitions, and Appliances
Every layer you add raises the floor, and over tile you are stacking onto a surface that already sits proud of the subfloor. Tile plus its mortar bed is often somewhere around 6 to 12 mm thick, and the vinyl plank adds roughly another 4 to 8 mm depending on the product and any underlayment. That cumulative rise is small in absolute terms and large in the places where clearance is tight.
Doors are the first casualty. Interior doors typically have only about 1/2 to 3/4 inch of gap beneath them, so even a few millimeters can leave a door dragging or refusing to close — which means undercutting the door or trimming its bottom. Built-in appliances are the more expensive surprise. A standard dishwasher rough opening is about 34 inches, and a floor raised under or in front of it can leave the unit trapped: fine until the day it needs to come out for repair or replacement, at which point the new floor is in the way. The same caution applies to built-in ovens and vanities sitting on the floor.
Transitions and stairs round out the list. Where the new floor meets a room at a different height, a transition strip bridges the step at the doorway. Stairs deserve special care: building codes commonly limit stair-riser height variation (often to about 3/8 inch), so a landing or tread that feeds onto the floor can turn a simple overlay into a code problem. The cheap insurance against all of this is to set a single sample plank on top of the tile at every door, threshold, and appliance, and confirm the clearance before you commit to the whole floor. Pulling the baseboards before you start gives you a clean edge to finish against and room for the expansion gap.
Prep Steps: How to Do It Right
Once the floor passes the checklist, the prep is straightforward and worth not rushing — most over-tile failures trace back to a step skipped here.
- Inspect. Tap every tile for loose, cracked, or hollow spots and mark the bad ones. Chip out and patch a few; reconsider the whole job if there are many.
- Test the height. Set a sample plank at each door, threshold, and appliance to confirm clearance, then pull the baseboards.
- Clean thoroughly. Scrub the tile with a degreasing cleaner to strip dirt, oil, and residue, and let it dry completely. Lightly scuff-sand a glossy glaze so a leveler or underlayment seats well.
- Handle grout and flatness. Fill grout joints wider than 1/4 inch or deeper than about 1/8 inch with a cementitious patching or self-leveling compound — or lay a thin underlayment over the whole floor. Recheck with a straightedge for that 3/16-inch-over-10-feet tolerance.
- Address moisture. Over a concrete slab, moisture can migrate up through grout, so use an underlayment with a built-in moisture barrier or a separate poly sheet. Even waterproof vinyl is not itself a moisture barrier for the structure beneath it.
- Leave an expansion gap. Hold the floor back from the perimeter walls — commonly about 1/4 to 3/8 inch — so a floating floor can move with temperature and humidity.
- Dry-lay, then install. Pull planks from several boxes to blend shade and pattern, and stagger the end joints from row to row so seams don't line up.
Before you buy, the one number that decides your order is how much plank the room actually needs — square footage plus a waste allowance for cuts. Enter the room and let the tool size the order, with the waste factor already applied:
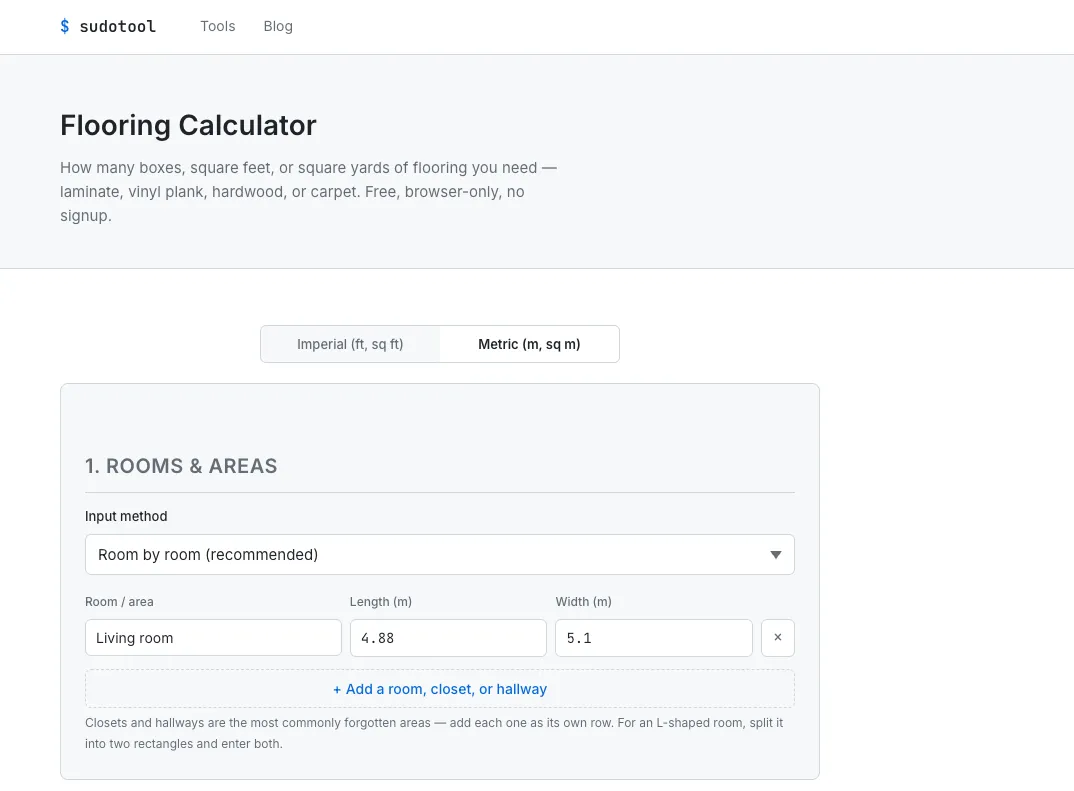
Once the floor passes the checklist, the calculator turns the room into square footage and a box count.
When to Remove the Tile Instead
Going over tile is the right call far more often than not, but there are clear cases where pulling it up is the smarter, cheaper-in-the-long-run move. Remove the tile when too much of it is failing — a common rule of thumb is that if more than roughly 20 percent of tiles are loose or cracked, removal is the better option, because patching that many spots is more work than a tear-out and still leaves an unreliable base. Remove it when the floor is too uneven to bring inside the flatness tolerance with leveler, or when lippage between tiles is severe.
Height is the other deciding factor. If going over the tile would stop a door from closing, trap a built-in appliance, or break a stair-riser height limit, and you can't solve it by undercutting, that conflict is reason enough to take the tile out and reclaim the height. Moisture is the last one: if water is actively rising through the slab and grout, a floating floor laid on top can trap it and invite mold, so the source needs addressing before anything goes down. And a safety note that overrides convenience — older tile or the sheet vinyl beneath it can contain asbestos, so it should not be sanded or aggressively disturbed; when that's a possibility, get it assessed by a professional rather than grinding away.
The honest summary: if your tile is solid, flat, and low enough to keep your doors and appliances happy, going over it saves real money, time, and mess. If it fails on bonding, flatness, height, or moisture, the floating floor will only inherit those problems — and that's the floor that calls for a tear-out.
The mirror image of this question is worth a look if you are still deciding what to lay: putting new tile over existing tile follows a similar logic of bonding, flatness, and added height, with its own thresholds.
Frequently Asked Questions
Can you put vinyl plank flooring directly over tile?
In most cases yes, as long as the tile is securely bonded with no loose or cracked pieces and the surface is flat. Click-lock floating vinyl plank is the standard method over tile, and you only have to fill deep grout lines first. If tiles are loose, cracked, or badly uneven, repair or remove them before you start.
Do I need to fill the grout lines before installing vinyl plank?
It depends on the grout depth. Shallow grout lines under about 1/16 inch are usually fine to leave as-is for a click-lock floor, but a general installer guideline is to fill grout deeper than about 1/8 inch with a self-leveling compound or skim coat. COREtec allows up to a 1/4 inch wide grout joint before a cementitious patch is needed.
How flat does the tile floor need to be for vinyl plank?
The common manufacturer standard is flat to within about 3/16 inch over a 10-foot span, or roughly 1/8 inch over 6 feet. Check it with a long straightedge or level, and fill any low spots with a self-leveling compound or grind down high spots until the floor is inside that tolerance.
Should I use floating click-lock or glue-down vinyl plank over tile?
Floating click-lock is generally preferred over tile. It needs no adhesive, so it sidesteps the trouble of bonding glue to glazed tile and grout lines, and it can be used right after install. Glue-down needs more surface prep, struggles to stick to glossy tile, and has to cure. Either way, the tile underneath must be solid.
Will vinyl plank over tile cause problems with my doors or dishwasher?
It can. Going over tile raises the floor by roughly 4 to 8 mm. Interior doors usually have only about 1/2 to 3/4 inch of clearance underneath, so you may have to undercut a door. A standard dishwasher rough opening is about 34 inches, so a raised floor can trap a built-in appliance. Test with a sample plank first.
When should I remove the tile instead of going over it?
A common rule of thumb is that if more than roughly 20 percent of tiles are loose or cracked, removal is the better option. Also remove the tile when the floor is too uneven to level, when doors, appliances, or stairs create height conflicts you can't solve, or when moisture is actively rising through the slab. Don't sand old tile or vinyl that may contain asbestos.
These are general guidelines, not a substitute for your product's instructions. Always follow the manufacturer's installation directions for your specific plank, underlayment, and subfloor, and consult a professional for structural, moisture, or asbestos concerns before you begin.
- USFloors / COREtec — COREtec Plus Engineered Luxury Vinyl Plank & Tile Installation Instructions (PDF). Manufacturer spec: subfloor flat and level to 3/16″ per 10 ft radius; ceramic tile, resilient tile and sheet vinyl must be well-bonded to subfloor, in good condition, clean and level; 1/4″ expansion gap; waterproof flooring is not itself a moisture barrier; do not sand existing vinyl as it may contain asbestos.
- COREtec Pro Series Installation Guide (via Georgia Carpet) — COREtec Pro Series Installation Guide. Manufacturer guidance: install over existing ceramic/porcelain tile with up to a 1/4-inch-wide grout joint; if wider, fill with a cementitious patching compound flush with the tile; subfloor flat to 3/16″ in 10′ or 1/8″ in 6′.
- This Old House — How To Install Vinyl Flooring Over Ceramic Tile. Reference for tapping tiles to find loose ones, using a grout leveling compound to bring joints flush, cleaning with a degreaser, and height issues around built-in vanities and stairs (with stair-tread height variation limited by code).
- Adair's Flooring — Can You Put Luxury Vinyl Planks Over Ceramic Tile. Reference for click-lock floating being preferred over tile (no adhesive needed), filling deep grout with a self-leveling compound, testing door and cabinet clearance with a sample plank, and glue-down requiring cure time.
- FlooringStores — How to Install Vinyl Plank Flooring Over Tile. Reference for glazed tile resisting adhesives, plank thickness of roughly 2–8 mm over tile of 6–12 mm, and interior-door clearance of about 1/2 to 3/4 inch (12–19 mm).
- D&G Flooring — Can You Put Vinyl Plank Over Tile? Reference for the conditions checklist, 3/16″-over-10-ft flatness, loose/cracked/hollow tiles indicating adhesion failure, the grout-depth tiers (under 1/16″, 1/16–1/8″, over 1/8″), a 1/4–3/8″ expansion gap, and the cases that call for removing the tile instead.