Image Compression Explained: How to Reduce File Size Without Losing Quality
From lossy vs lossless to the five-step JPEG pipeline — everything you need to know about making images smaller, faster, and better for the web.
The heaviest thing on the web page you're looking at right now isn't the text. According to the HTTP Archive 2025 Web Almanac, images account for roughly 37% of the median desktop page weight — about 1,058 KB out of a total 2,862 KB. Each page loads a median of 19 image requests, consuming more bytes than JavaScript (697 KB).
Why does this matter? Google's research shows that when page load time increases from one second to three seconds, bounce probability rises by 32%. At five seconds, it jumps to 90%. With mobile devices now accounting for roughly 60% of all global web traffic, a single unoptimized image can ruin the entire user experience.
This guide explains how image compression actually works — the five-step process JPEG uses to discard data, the difference between lossy and lossless, how to choose the right format, the optimal quality settings, and how all of this connects to website performance and search rankings. Whether you're a developer, blogger, or online store owner, you'll walk away knowing exactly how to reduce file size without sacrificing visual quality.
What Is Image Compression?
Image compression is the process of reducing the file size of a digital image while maintaining acceptable visual quality. It works by removing redundant or less important data from the image file, or by encoding the same information more efficiently. There are two main types: lossy compression, which permanently discards some data, and lossless compression, which preserves every single pixel of the original.
Why does this matter in practice? A single photo taken on a smartphone is typically 3–8 MB. Put five images in a blog post and that's 15–40 MB of images alone. With proper compression, you can shrink those same five images to 500 KB–1 MB — with virtually no visible difference.
The fundamental principle behind compression is straightforward: remove information that human eyes can't easily detect, or represent repeating patterns with shorter codes. For example, if a photo of the sky has 1,000 consecutive pixels of nearly identical blue, it's far more efficient to record "blue × 1,000" than to store each pixel's color value individually.
Lossy vs Lossless Compression: What's the Difference?
Understanding image compression starts with distinguishing two fundamentally different approaches.
Lossy compression permanently removes data that human vision is least sensitive to — subtle color variations, high-frequency detail in busy areas, fine gradients. It can reduce file sizes by 70–95%, but once removed, the data is gone forever. JPEG, WebP (lossy mode), and AVIF use this approach.
Lossless compression preserves every single pixel. Instead of removing data, it finds more efficient ways to represent the same information using mathematical algorithms. File size savings are more modest — typically 20–50% — but decompressing the file produces an image that is bit-for-bit identical to the original. PNG, WebP (lossless mode), and GIF use this approach.
| Feature | Lossy Compression | Lossless Compression |
|---|---|---|
| How it works | Permanently removes data the eye can't easily detect | Re-encodes data more efficiently without removing any |
| Compression ratio | 70–95% file size reduction | 20–50% file size reduction |
| Original recovery | Not possible | Perfectly reversible |
| Common formats | JPEG, WebP (lossy), AVIF | PNG, WebP (lossless), GIF |
| Best for | Photos, web images, social media | Logos, text, screenshots, medical imaging |
| Visual quality | Indistinguishable at high settings | 100% identical to original |
Which should you choose? For most web images, lossy compression is the right answer. At quality settings of 70–80%, the difference from the original is nearly impossible to see with the naked eye, while file sizes drop dramatically. Use lossless compression when you're working with logos, text-heavy images, files that need future editing, or cases where pixel-perfect accuracy matters — like medical imaging.
How JPEG Compression Works — A Five-Step Pipeline
JPEG was standardized in 1992, yet it remains the most widely used image format on the internet more than 30 years later. The process JPEG uses to shrink files is remarkably sophisticated. Here's how it works, step by step.
1. Color space conversion (RGB → YCbCr). Computers store images as three channels: red (R), green (G), and blue (B). JPEG first converts these into a different color space called YCbCr — where Y represents brightness (luminance) and Cb/Cr represent color information (chrominance). Why? Because human eyes are far more sensitive to brightness changes than color changes. This property allows the color channels to be compressed much more aggressively.
2. Chroma subsampling. After the color space conversion, the Cb and Cr channels (color information) are sampled at a lower resolution — typically 4:2:0, meaning four luminance samples for every one chrominance sample. This step alone cuts the data by roughly 50%, and most people cannot tell the difference.
3. Discrete Cosine Transform (DCT). The image is divided into 8×8 pixel blocks (64 pixels each). A mathematical operation called DCT converts each block from pixel brightness values (spatial domain) to frequency coefficients (frequency domain). In plain terms, it answers the question: "How much of this block is smooth gradual change, and how much is sharp fine detail?" Low-frequency coefficients represent smooth color transitions; high-frequency coefficients represent edges and fine texture.
4. Quantization. This is where the actual data loss happens. Each DCT coefficient is divided by a value from a quantization table and rounded to the nearest integer. High-frequency coefficients get larger divisors — meaning more aggressive rounding — because humans are poor at distinguishing high-frequency brightness variations. The quality slider controls the strength of this quantization. Lower quality means larger divisors, more coefficients rounded to zero, smaller files — but more detail is lost.
5. Entropy coding. The quantized coefficients are read in a zigzag pattern (low frequency to high frequency). Because quantization produces many zeros in the high-frequency range, Run-Length Encoding efficiently compresses those sequences of zeros. Then Huffman coding assigns shorter codes to frequently occurring values and longer codes to rare ones. This final step is lossless — no additional quality is lost.
This five-step pipeline is how JPEG can store an image at just 5–10% of its uncompressed file size while maintaining visually acceptable quality. The math is complex, but the core principle is simple: aggressively discard the information that human vision ignores.
Image Formats Compared: JPEG vs PNG vs WebP vs AVIF
Choosing the right format can mean a 2–10× difference in file size for the same image. Here's how the major formats compare.
| Feature | JPEG | PNG | WebP | AVIF |
|---|---|---|---|---|
| Compression type | Lossy | Lossless | Lossy + Lossless | Lossy + Lossless |
| Transparency | No | Full alpha channel | Yes (even in lossy mode) | Yes |
| Animation | No | APNG (limited) | Yes | Yes |
| Color depth | 8-bit (24-bit color) | Up to 16-bit (48-bit color) | 8-bit | 8/10/12-bit (HDR) |
| Size vs JPEG | Baseline | 2–5× larger (photos) | 25–34% smaller | ~50% smaller |
| Browser support | 100% | 100% | 97%+ | ~95–97% |
| Best for | Photos, complex images | Logos, text, transparency | General web images | High-quality photos, HDR |
Which Format Should You Use?
If choosing a format feels overwhelming, follow these simple rules:
Photographs and complex images → WebP or AVIF. They're 25–50% smaller than JPEG at equivalent quality. Use JPEG as a fallback for older browsers.
Images that need transparency → PNG or WebP. WebP supports transparency even in lossy mode, which makes it significantly smaller than PNG for transparent photos.
Logos, icons, and simple graphics → SVG (vector, infinitely scalable) or PNG.
Animations → WebP (far smaller than GIF). For longer animations, MP4/WebM video is even more efficient.
Next-Generation Formats: AVIF and JPEG XL
AVIF is the still-image version of the AV1 video codec. Netflix published a detailed technical analysis in 2020 describing AVIF as a format for "next-generation image coding." AVIF uses over 60 prediction modes (compared to WebP's 4 macroblock-level modes), enabling highly accurate predictions across diverse image content. As of 2026, AVIF is supported in Chrome, Firefox, Safari, and Edge, with browser support reaching approximately 95–97%.
JPEG XL is the official successor to JPEG, with a unique ability to losslessly transcode existing JPEG files into smaller ones. However, its browser support has been turbulent — Chrome removed support in 2022, then reversed that decision in late 2025, shipping it behind a flag in Chrome 145. As of early 2026, JPEG XL is not yet ready for widespread production use.
The practical recommendation for 2026: WebP is the safest all-around choice — over 97% browser support with 25–34% smaller files than JPEG. Use AVIF when you want even better compression and can provide a fallback with the <picture> element.
The Quality vs File Size Sweet Spot
"Shouldn't I always set quality to 100% for the best results?" — this is one of the most common misconceptions about image compression.
JPEG quality settings don't scale linearly. Dropping from quality 100 to 80 reduces file size by roughly 40%, yet the visual difference is virtually imperceptible. But dropping from 80 to 60 produces a much smaller additional saving while introducing noticeable artifacts.
| Quality Setting | File Size (relative to Q100) | Visual Difference |
|---|---|---|
| 100% | Baseline (e.g., ~1 MB) | Reference image |
| 90% | ~50–60% | Imperceptible |
| 80% | ~35–40% | Virtually imperceptible |
| 70% | ~25–30% | Minor differences, suitable for web |
| 60% | ~20% | Slight softening, still acceptable |
| 50% | ~15% | Noticeable artifacts begin |
The key insight is that 70–80% is the "sweet spot." In this range, file sizes drop to roughly one-third of the original while visual quality remains nearly indistinguishable from the source.
One important caveat: JPEG quality numbers are not true percentages. Each software maps them differently, so Photoshop's quality 80 and ImageMagick's quality 80 may produce different results. Judge by the actual output, not the number.
Recommended settings by use case:
General web photos: 75–85%. Hero images and portfolios: 85–90%. Thumbnails: 60–70%. E-commerce product images: 80–85%. As a general target, most web images should be under 200 KB.
How Image Compression Affects Website Performance
Optimizing images isn't just about saving disk space — it directly affects search rankings and user experience.
Core Web Vitals and LCP
Google has used Core Web Vitals as a ranking factor since mid-2021. Among the three metrics, LCP (Largest Contentful Paint) is the one most closely tied to images. LCP measures how long it takes for the largest content element on the page — usually an image — to load.
The thresholds are: Good: 2.5 seconds or less. Needs Improvement: 2.5–4 seconds. Poor: over 4 seconds.
A study by Advanced Web Ranking analyzing 3 million pages found that pages ranking in positions 1–3 had measurably lower LCP values than those in positions 8–10. Among the three Core Web Vitals metrics, LCP showed the strongest observed correlation with ranking position.
Bounce Rate and Conversions
Speed is money. According to Akamai's research, a 2-second delay in page load increases bounce rates by 103%. The Deloitte "Milliseconds Make Millions" study found that a mere 0.1-second improvement in mobile site speed increased retail conversions by 8.4% and average order value by 9.2%. Google's own research shows that users are 24% less likely to abandon pages that meet Core Web Vitals thresholds.
Responsive Images and Lazy Loading
Compression works best when combined with two essential techniques:
Responsive images (srcset). The srcset attribute lets the browser automatically select the right image size for the device. According to MDN, an 800px-wide version of an image might be 128 KB, while a 480px version is just 63 KB — saving 65 KB per image per visitor on mobile.
Lazy loading. Adding loading="lazy" to images below the fold tells the browser not to fetch them until the user scrolls near them. But there's a critical rule: never lazy-load the LCP image (usually the hero image). Doing so directly hurts the most important Core Web Vitals metric. Instead, set fetchpriority="high" on your LCP image so the browser prioritizes it. Google's case studies show this combination alone can improve LCP by 200–800 ms.
Common Myths and Mistakes
Here are the most frequent image compression mistakes. If any of these apply to you, fixing them could make an immediate difference.
1. Using PNG for photographs. PNG is a lossless format — using it for photos produces files 2–5× larger than JPEG. PNG is meant for logos, text-heavy images, and images that need transparency. For photos, use JPEG, WebP, or AVIF.
2. Setting quality to 100 "just to be safe." Quality 100 produces files roughly 1.7–2× larger than quality 80, with virtually no visible difference. Most image editing tools default to unnecessarily high quality settings.
3. Uploading images at original resolution. If your CSS displays an image at 800 pixels wide, but you uploaded the original 4,000-pixel photo, the browser downloads the entire 4,000-pixel file and then scales it down. Resize on the server — the 800px version is often one-quarter to one-tenth the file size.
4. Compressing the same image repeatedly. Lossy compression is cumulative. Every time you open and re-save a JPEG, quality degrades slightly — a phenomenon called generational loss. Always work from the original file and export the final version only once.
5. Lazy-loading the LCP image. As explained above, applying loading="lazy" to the largest visible element on the page directly worsens LCP — the single most important Core Web Vitals metric for images.
6. Ignoring modern formats like WebP and AVIF. If you're still serving only JPEG and PNG in 2026, you're missing 25–50% in file size savings. WebP has over 97% browser support — there's no reason not to use it.
7. Not stripping EXIF metadata. Photos taken on smartphones contain EXIF data — camera settings, GPS coordinates, date and time. This adds tens of kilobytes per image and, worse, GPS coordinates can be a privacy risk. Always remove metadata before publishing images to the web.
Frequently Asked Questions
What is image compression?
Image compression is the process of reducing a digital image's file size while maintaining acceptable visual quality. It works by removing redundant or less important data, or by encoding the same information more efficiently. There are two types: lossy (permanently removes data) and lossless (preserves all original data).
Does compressing an image reduce its quality?
It depends on the type. Lossy compression (JPEG) slightly reduces quality, but at 70–80% quality settings the change is virtually invisible to the human eye. Lossless compression (PNG) preserves 100% of the original quality. The key is finding the right balance between file size and acceptable quality.
What is the best image format for websites?
As of 2026, WebP is the most versatile choice — over 97% browser support, 25–34% smaller than JPEG, with transparency and animation support. For even better compression, use AVIF with a JPEG fallback. Use PNG only for logos, text, and images requiring transparency.
How does JPEG compression work?
JPEG compression follows five steps: (1) convert colors from RGB to YCbCr, (2) reduce color resolution via chroma subsampling, (3) apply DCT (Discrete Cosine Transform) to 8×8 pixel blocks, (4) quantize the frequency coefficients — this is where data is lost, (5) apply Huffman coding for final encoding.
Can you restore a compressed image to its original quality?
For lossless compression (PNG, WebP lossless) — yes, decompressing produces a bit-for-bit identical copy of the original. For lossy compression (JPEG, WebP lossy) — no, the discarded data is gone permanently. That's why you should always keep the original file and export for web separately.
What is a good image quality setting?
For most web images, 75–85% is the sweet spot. File sizes drop to roughly 35–40% of the quality-100 version, with virtually no visible difference. Use 85–90% for hero images and portfolios, and 60–70% for thumbnails.
Does image compression affect SEO?
Yes, directly. Google uses Core Web Vitals — especially LCP (Largest Contentful Paint) — as a ranking factor. Unoptimized images are one of the most common causes of poor LCP scores. Properly compressing and sizing images can significantly improve LCP, which in turn can positively affect search rankings.
What is the difference between lossy and lossless compression?
Lossy compression permanently removes data to achieve smaller files — JPEG typically achieves 70–95% size reduction. Lossless compression preserves all original data while reducing file size — PNG typically achieves 20–50% reduction. Lossy produces smaller files but can't be reversed; lossless can be perfectly restored but achieves less compression.
Start Optimizing Your Images Today
Image compression is built on complex mathematics, but putting it into practice is simple. Here are the three things that matter most:
Choose the right format — WebP or AVIF for photos, SVG or PNG for logos. Set quality to 75–85% — file sizes drop to one-third while quality stays intact. Use responsive images and lazy loading — don't send mobile users desktop-sized files.
The best way to learn is to try it yourself. SudoTool's Image Compressor lets you compress images directly in your browser with three modes — Quality, Target Size, and Resize. Your images never leave your device, so privacy is fully protected.
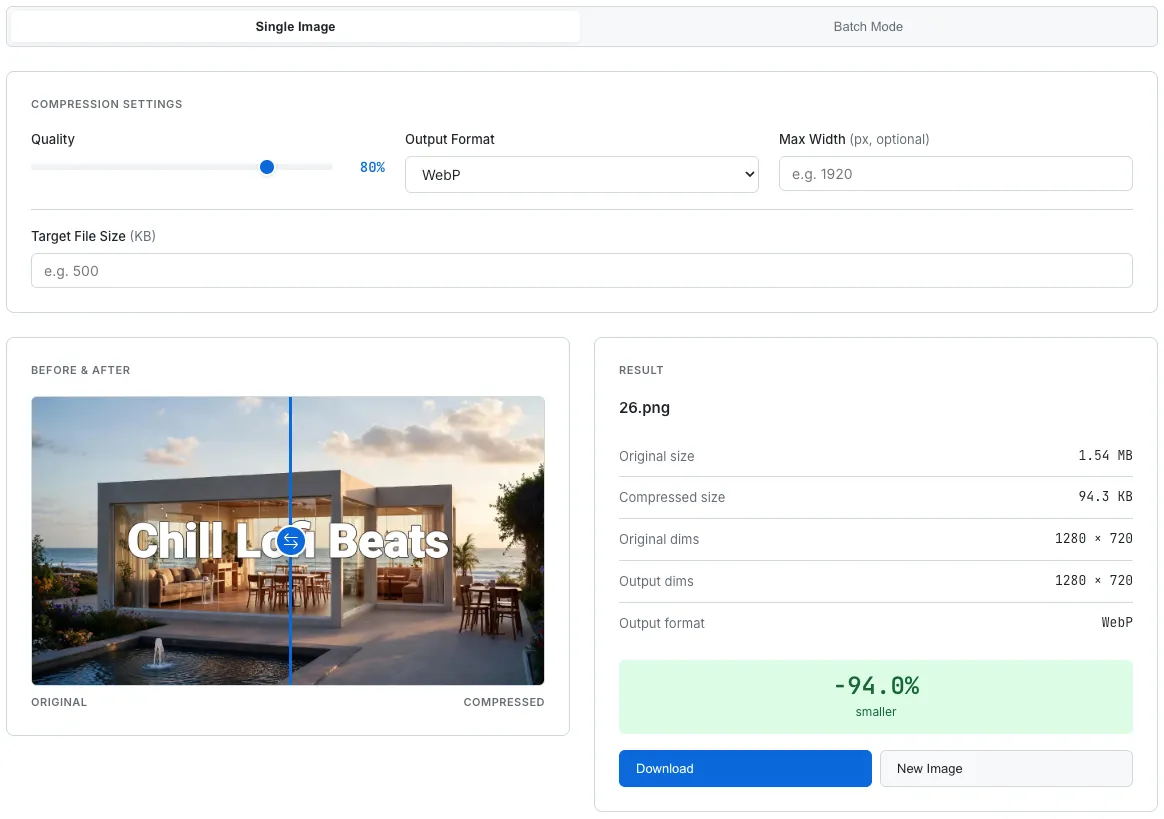
SudoTool Image Compressor — compress, resize, and convert images directly in your browser with no upload required.
Curious about how this tool was built? Read why we built a browser-based image compressor — the design decisions, technical trade-offs, and lessons learned along the way.